The Techniques & Care of Original Prints
Definition
An original print should not be confused with a reproduction. The latter is a
photo-mechanical copy of art done in a different medium. Posters and
“limited edition reproduction prints” are examples. The original print
is designed for the process chosen by the artist, who first carves
the block, etches the plate, or makes a silkscreen stencil. Then the
artist will hand ink the printing surface, and make the print. Each
color usually requires a separate block, plate or screen.
The artist can repeat the process to create a number of almost identical
images, called “an edition.” There are often individual variations
between prints in the same edition, and each must be considered
an individual composition. Usually the number of prints will be
limited by the artist, who will destroy the blocks or plates after
completing the series. The numbers at the bottom of a print, such
as “7/50,” means that this particular print is the seventh of an
edition of fifty. The artist may also produce trial proofs or artist
proofs, which are in addition to the numbered edition. Notations
such as AP, TP, EP or HC are used to mark these works, which are
generally limited to a maximum of ten percent of the edition.
Return
to Top
Printmaking
Techniques
(A)
THE RELIEF PRINT:
This category includes woodblock, woodcut, wood engraving, metalcut,
linocut, stonecut and collagraph. The common factor is that
the plate has had some sections cut away, and printing is done
by transferring ink from the top surface of the plate to the
paper. Woodblocks are probably the best known variety of relief
prints. Each color requires a separate block and printing, and
careful registering. They can be often be recognized by indications
of wood grain showing in the print.
|
|
(B)
THE INTAGLIO PRINT:
Etching and engraving are the most familiar, but there is also drypoint,
mezzotint, aquatint, and collagraph. Unlike the relief process,
the area that is printed lies below the top surface. The plate
is processed to achieve different levels and assorted textured
surface to which ink adheres. The upper smooth surface is wiped
clean of ink prior to printing.
The intaglio print can be recognized by the embossed edges
resulting from the heavy pressure of the press that is necessary
to force ink from the crevices of the plate and onto the paper.
|
|
THE PLANOGRAPHIC PRINT:
Lithographs represent this category. The printing plate is neither cut
into or built up, but remains a single continuous surface.
The antipathy of grease for water determines the process.
The plate–aluminum, zinc or limestone–must be chemically
treated to make the surface water absorbent. The image is
created with a grease-based compound.
Watery textures can be created by painting with an oil and water
solution. The plate is repeatedly inked with a roller, after
being sponged with water. This is done until the proper amount
of ink adheres to the greasy image, while the water removes
excess ink from the ungreased areas. Paper is placed on the
plate, and it is run through a press. Additional colors require
separate plates and printing. Lithographs can be recognized
by their painterly qualities of spontaneous brush strokes,
watery textures, or crayon textures. The surface is flat,
without embossing or plate marks. The original lithograph
should not be confused with offset lithography, which is a
photomechanical process used to produce posters and other
reproduction prints. |
|
THE STENCIL PRINT:
Silkscreens, or serigraphs, are the most common form of stencil printing.
A silk or nylon mesh screen is treated with an ink-resistant
material. The images that are printed come from ink being
forced through the untreated parts of the screen, and onto
a sheet of paper. The stencil can be made of paper, which
permits no ink to penetrate, while the use of tusches painted
onto the screen allow gradations of tone and color. Also,
light-sensitive emulsions can be applied which allow the transfer
of photo images onto the screen. For each color, there must
be a separate stencil and inking. Stencil prints can be recognized
by the thickness of the ink which seems to lie on top of the
paper surface, by the bold flat colors, and sometimes by the
mesh texture of the silk impressed into the ink on the paper.
|
|
COMBINATION PROCESSES:
Artists often combine several printing methods. A paper may be preprinted
with colors using silkscreen or woodblock techniques, and
then run through a press with an engraved plate.
A lithographer might add silkscreened details to his work, or
a woodcut artist might find it desirable to put the woodblock
through an etching press to get an embossed impression as
well as the inked image. The experimental opportunities are
endless, and innumerable combinations are being attempted
by artists around the world. |
|
Return
to Top
Proper Care of Original Prints
- Never cut or trim the edges of paper. Uneven edges can be seen as part
of the originality of handmade papers–or use matboards to achieve
strictly perpendicular edges.
- Use care when handling a print–creases and folds are difficult to
remove. Use two hands to grip the paper in order to avoid inadvertent
bending. Carefully flatten unrolled prints with smooth heavy objects
placed at the corners.
- Matting and framing provide optimal protection. Avoid prolonged use of
glass and clips, or other mounting systems that may run risks
of condensation, insect infestation or other hazards. Matting
not only enhances the beauty of the work, but also keeps it away
from direct contact with the glass. Continuous moldings help maintain
dryness, even in damp climates.
- Select acid-free matboards to prevent discoloration and deterioration
of paper and inks. The best is 100% rag matboard–two or four
ply. White linen, cotton and silk are also acceptable. Don’t forget
that the backing and hinges for the artwork should also be acid-free.
- When framing, use hinges such as Japanese paper, film-o-plast
or glassine at the top edge of the print only. Do not attach original
art to a backing with glue, paste or drymounting. Hinges prevent
slippage of the art in relation to the mat, and should be of a
material weaker than the paper of the print, so they will tear
first if any stress is applied.
- If you must store prints unframed, place them flat in a portfolio,
away from dust and sunlight. The container should be acid-free,
and not fully airtight, to avoid water condensation. Use guard
sheets of tissue or glassine between prints, and examine several
times a year to check for termites, silverfish, mice or mildew.
If damaged, always go to a professional for repair.
- When hanging prints, avoid walls that get a lot of direct sunlight.
Some plexiglass will prevent ultraviolet penetration, but it tends
to attract dust and is easily scratched–use an antistatic cloth
for cleaning. Art framed under glass should be cleaned by applying
cleanser to cloth, rather than spraying directly onto the framed
artwork.
Return
to Top
Displaying Framed Prints:
To optimize your enjoyment of prints, use thought and variation in hanging arrangements.
Rather than placing same-sized prints side by side, drop one down
a third. This will avoid making the eyes jump back and forth. Try
combinations of prints of different sizes and shapes, perhaps with
a blank wall as a counterbalance. A dynamic pairing is to use two
prints of roughly the same size, but one in a horizontal format and
the other vertical.
Eye level is the most pleasing height for hanging any artwork. Try placing
small prints in areas where you can see them up close–hallways,
bathrooms, stairways or entries. Also, experiment with moving your
prints around to different locations, so that you can experience
them anew.
Even if you have only a few prints, it is often a good idea to periodically
change them. Put several away in a dark storage area to “rest” for
a few months. Your living environment can be changed by displaying
different prints at different seasons of the year–cool, light abstracts
in the summer, and warm rich prints in reds and browns in the winter
or fall. Use your imagination, and you will find your pleasure in
the prints greatly enhanced.
Return
to Top
|

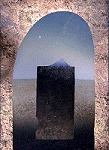
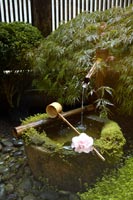 photo by Svein Olslund